How to Transfer iPhone Photos to a Windows PC (2026 Guide)
2026-05-19 · Updated 2026-06-16 · 10 min read
HeicSave team
We test HEIC workflows on Windows 11, macOS, Chrome, and Edge before publishing. Editorial standards
Last updated: June 16, 2026
Copying iPhone photos to a Windows PC sounds simple until every file ends in .heic and Explorer shows blank icons.
Why Windows struggles with iPhone photos
Modern iPhones save stills as HEIC. Windows 10 and 11 do not always open .heic out of the box—you get blank thumbnails, Photos errors, or email attachments that never send.
JPG is still what most Windows apps, printers, and upload forms expect.
Method 1: USB cable (File Explorer)
- Connect iPhone with Lightning or USB-C.
- Unlock the phone and tap Trust This Computer if asked.
- Open File Explorer → Apple iPhone → Internal Storage → DCIM.
- Copy folders to your PC.
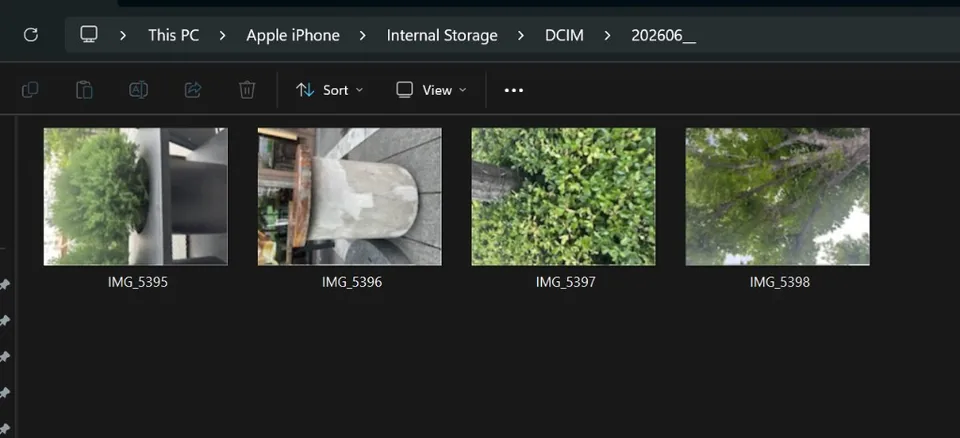
Copied files are often still HEIC. They may not preview until you install codecs or convert.
USB transfer format: Automatic vs Keep Originals
Settings → Photos → Transfer to Mac or PC decides whether iOS re-encodes on the wire:
- Automatic — JPG only if iOS thinks the PC cannot read HEIC (often wrong on Windows 11).
- Keep Originals — always HEIC on copy.
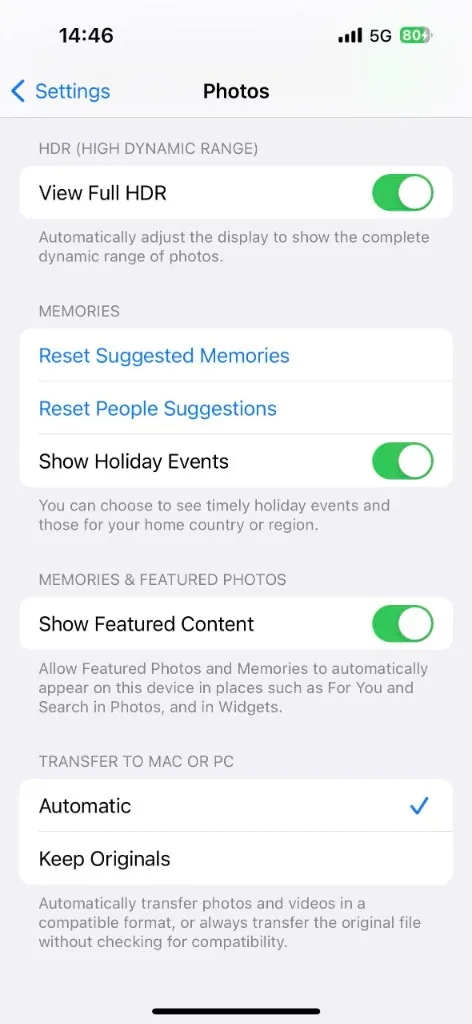
If you see all .heic in DCIM despite Automatic, install HEIF extensions or convert with HEIC to JPG.
Method 2: iCloud for Windows
Install iCloud for Windows, sign in, enable Photos. New shots sync to the iCloud Photos folder on your PC.
Sync can take time on slow connections. HEIC compatibility on Windows still applies unless the iPhone camera uses Most Compatible (JPG). See Turn off HEIC on iPhone.
Method 3: Convert HEIC to JPG in the browser (no install)
If you already copied HEIC files—or moved them from a Mac via USB stick—convert locally:
- Open HEIC to JPG in Chrome or Edge.
- Drag .heic files into the drop zone.
- Adjust JPEG quality if needed (default 90%).
- Click Convert, then download each JPG or Download all as ZIP.
Processing stays in your browser. Nothing uploads to our servers.
Method 4: Shoot JPG on iPhone going forward
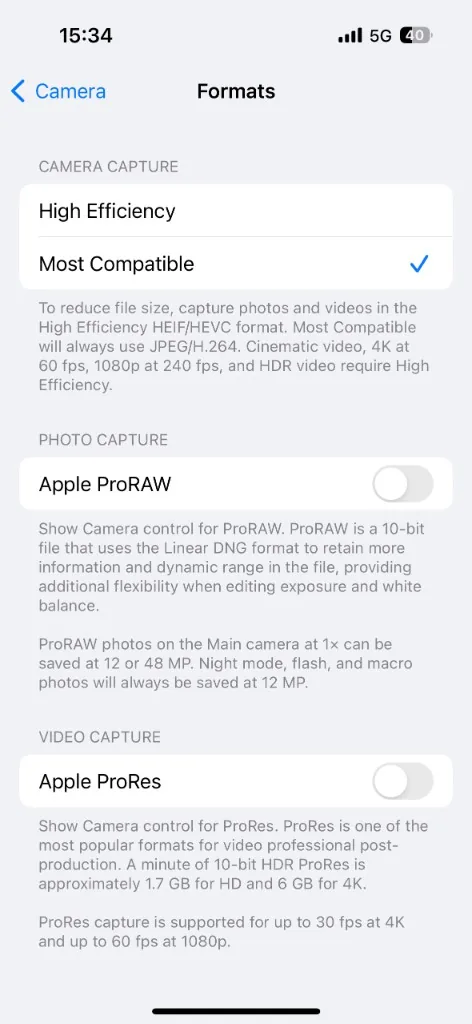
Settings → Camera → Formats → Most Compatible makes new photos JPEG. Existing HEIC files still need conversion.
Batch tips for large albums
There is no fixed file-count cap on HeicSave. Practical limits are your PC memory and browser tab stability. For hundreds of vacation photos, follow our batch HEIC to JPG workflow (RAM batch sizes, ZIP, quality slider):
- Convert in groups of 50–100 if the tab feels slow.
- Close other heavy tabs before a big batch.
- Prefer desktop Chrome or Edge over mobile Safari for very large folders.
HEIC vs JPG after transfer
| Goal | Format |
|---|---|
| Keep iPhone storage efficient | HEIC on phone |
| Open on Windows without codecs | JPG on PC |
| Print shop or government portal | JPG |
| Edit with maximum flexibility | HEIC to PNG first |
Troubleshooting
- PC does not see iPhone — try another cable, unlock phone, reinstall Apple Mobile Device support / iTunes components on older Windows builds.
- Photos look rotated wrong — EXIF orientation is copied to JPG when supported; re-export from Photos on Mac if needed.
- Live Photo pairs (.heic + .mov) — convert the .heic still; see our Live Photo guide.
For a Windows-only walkthrough, see How to Open and Convert HEIC on Windows. For Google Drive albums, see Batch convert HEIC from Google Drive. Learn who operates HeicSave and our editorial standards.