Convert HEIC to JPG on Mac : Preview vs Online Tools
2026-02-05 · Updated 2026-06-16 · 9 min read
HeicSave team
We test HEIC workflows on Windows 11, macOS, Chrome, and Edge before publishing. Editorial standards
Last updated: June 16, 2026
Mac opens HEIC natively in Preview and Photos. That hides the problem until you email files to someone on Windows or upload to a portal that only lists JPG.
Preview method (one file at a time)
- Open HEIC in Preview.
- File → Export.
- Choose JPEG, set quality, save.
Fine for a single image. Tedious for dozens from a trip folder.

Batch in Preview (hidden shortcut)
Select multiple HEIC files in Finder → Open With → Preview. In the sidebar, select all thumbnails, then File → Export Selected Images. Pick JPEG. Still slower than a dedicated batch tool for 100+ files.
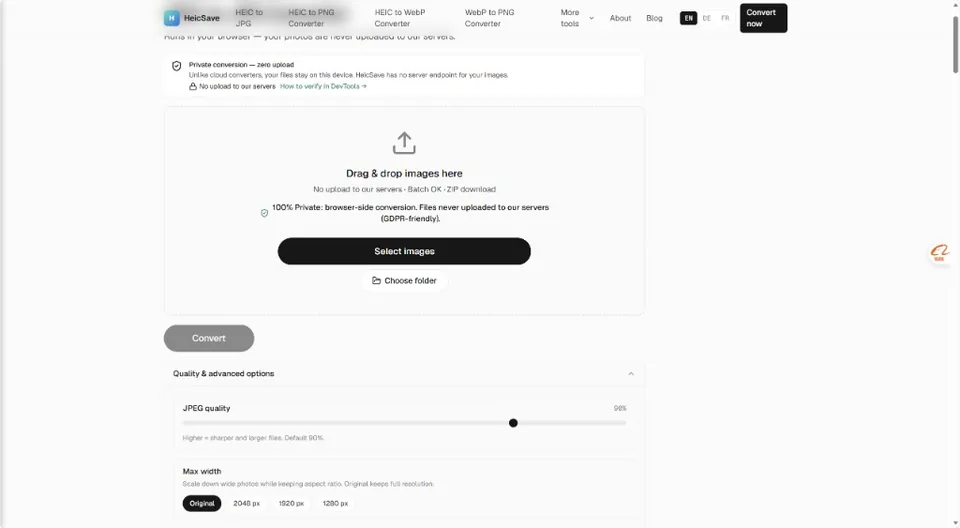
Online batch tool (no upload)
Use HEIC to JPG in Safari or Chrome:
- Drop many files at once
- Adjust JPEG quality on the slider
- Download a ZIP of all JPGs
- EXIF (date taken, camera) preserved when possible
We test this path on macOS Sonoma and Sequoia before publishing updates.
When Preview beats the browser
You need one perfect export with manual color tweaks in Preview’s inspector. For plain conversion at scale, browser batch is usually faster.
Privacy
Browser tools that decode locally never send photos to a third-party server. Useful for client work under NDA or medical images you cannot upload anywhere.